


COMSTICKC
3D Distressed Neutral Brick Wall Panels Peel and Stick
3D Distressed Neutral Brick Wall Panels Peel and Stick
Couldn't load pickup availability
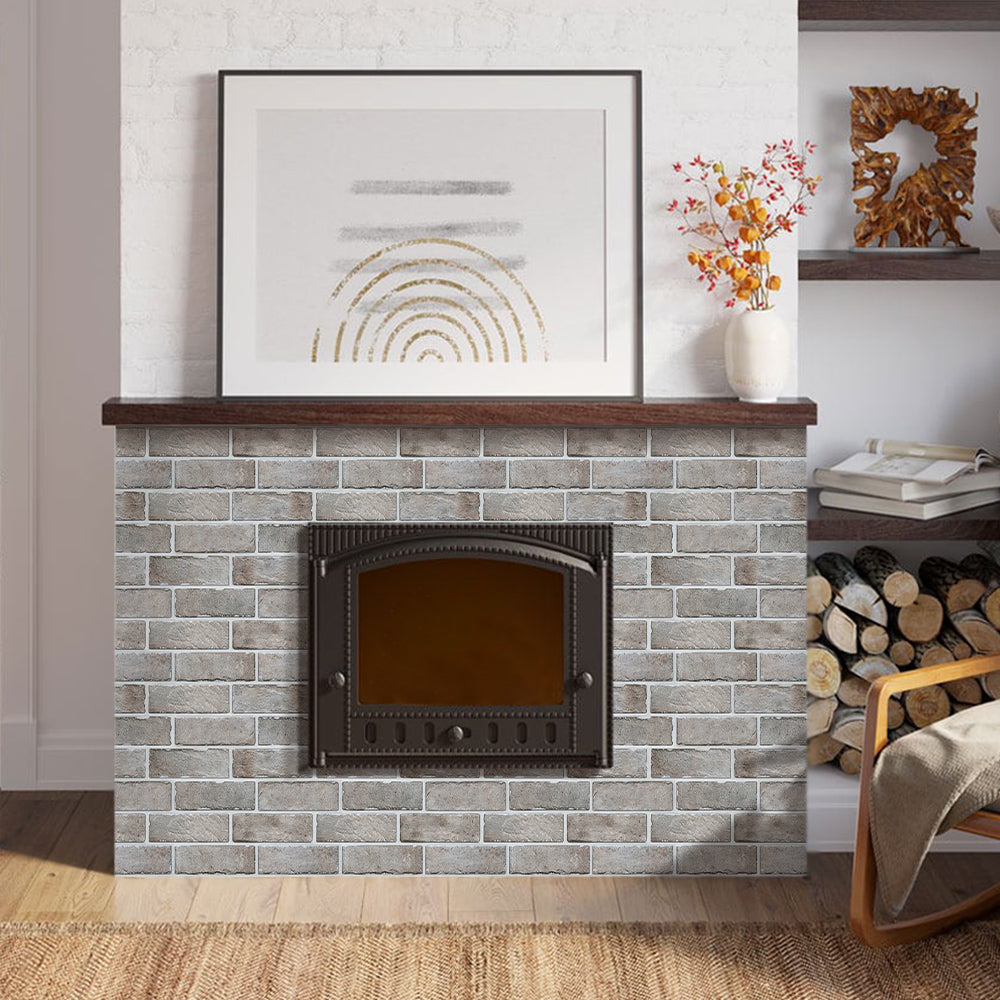
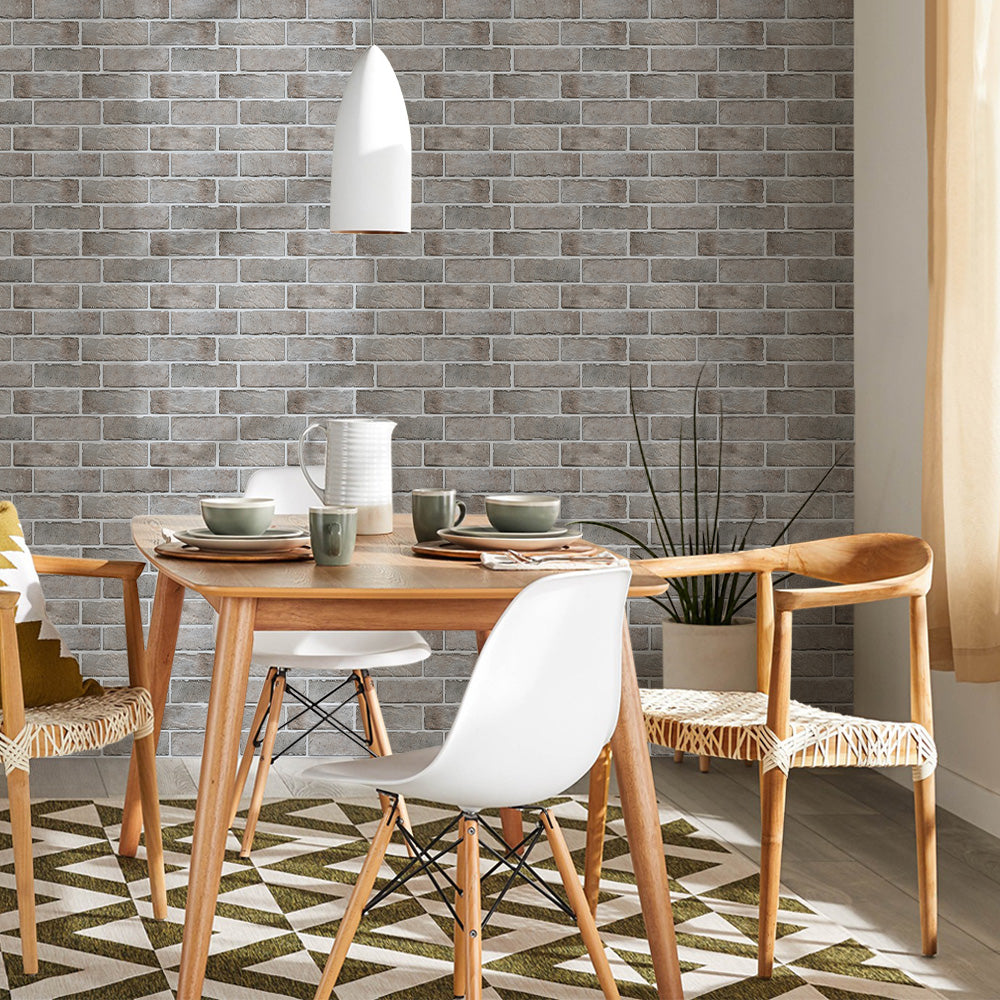
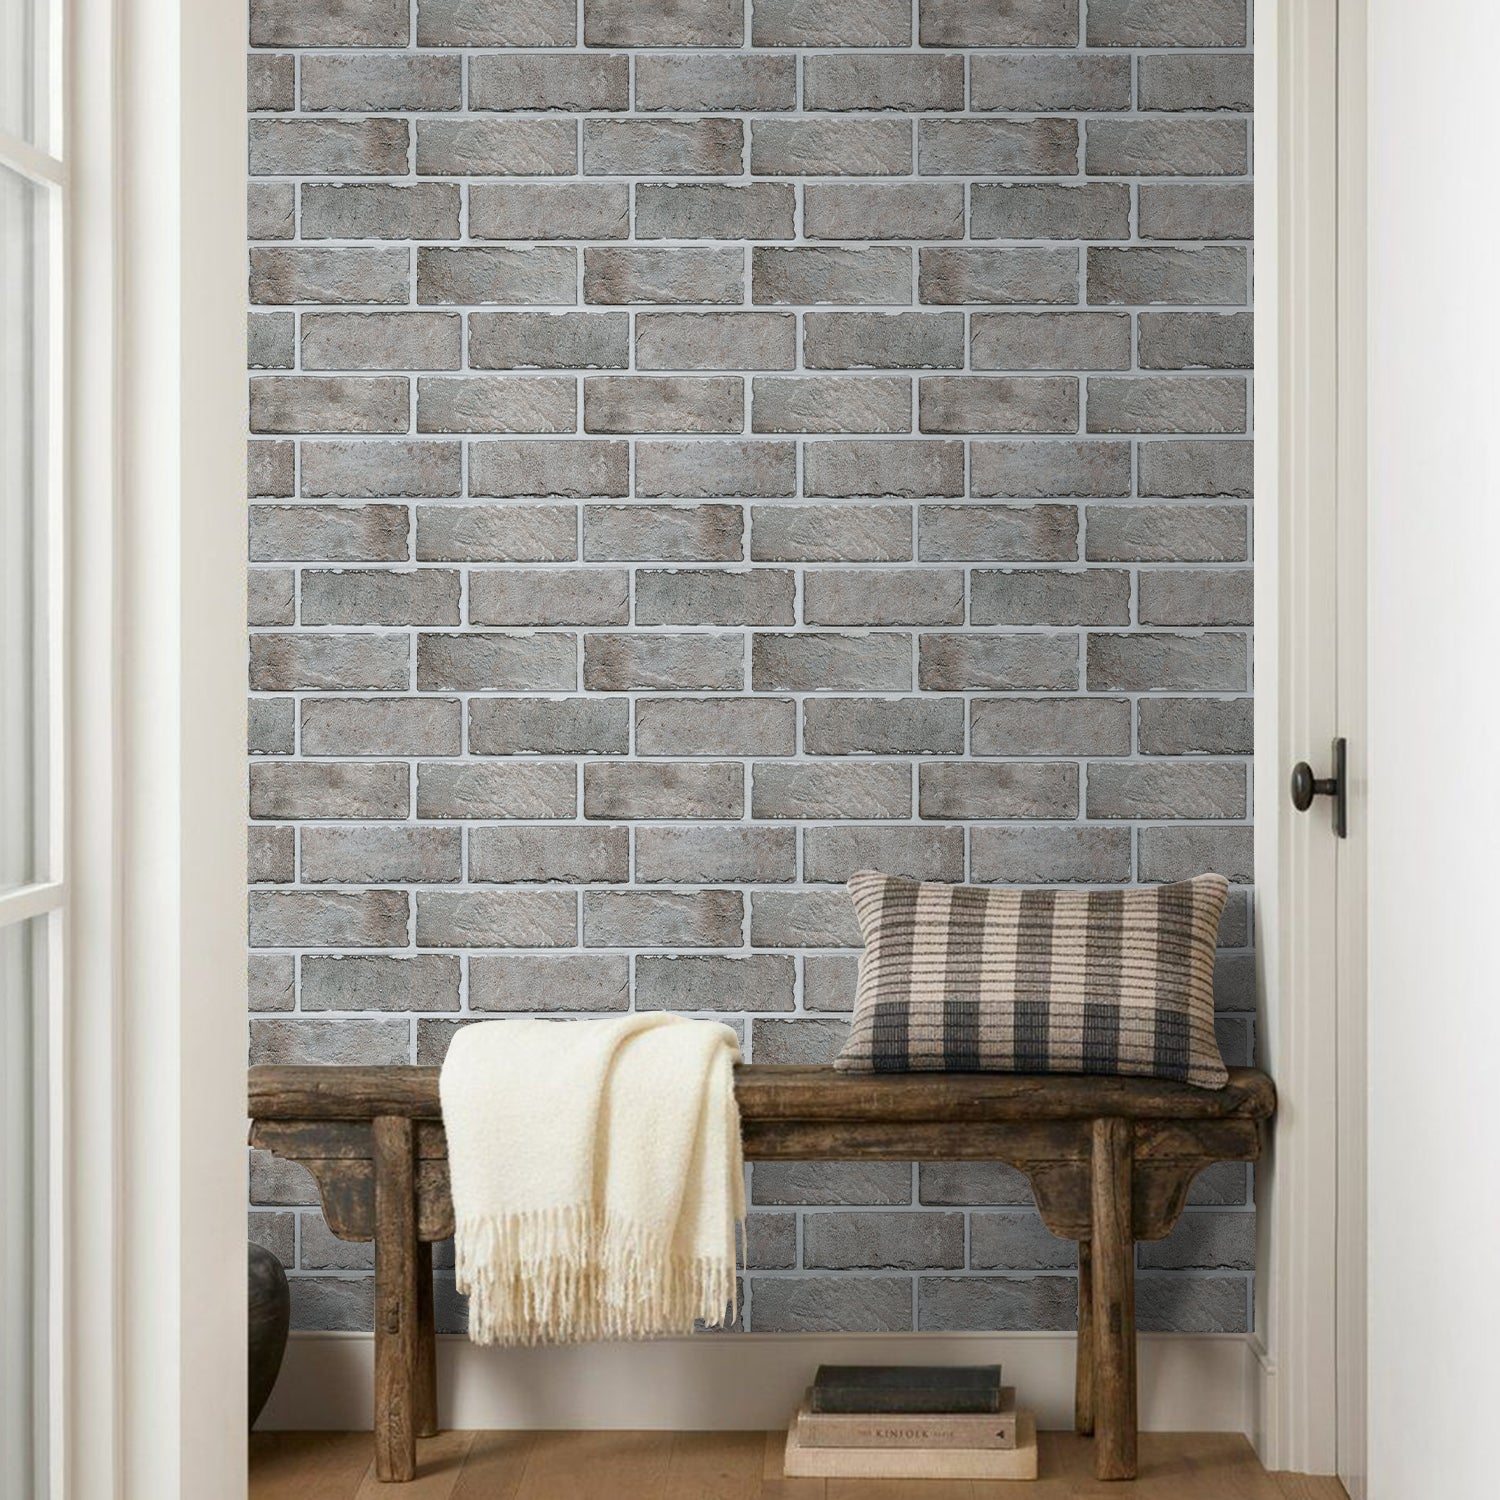
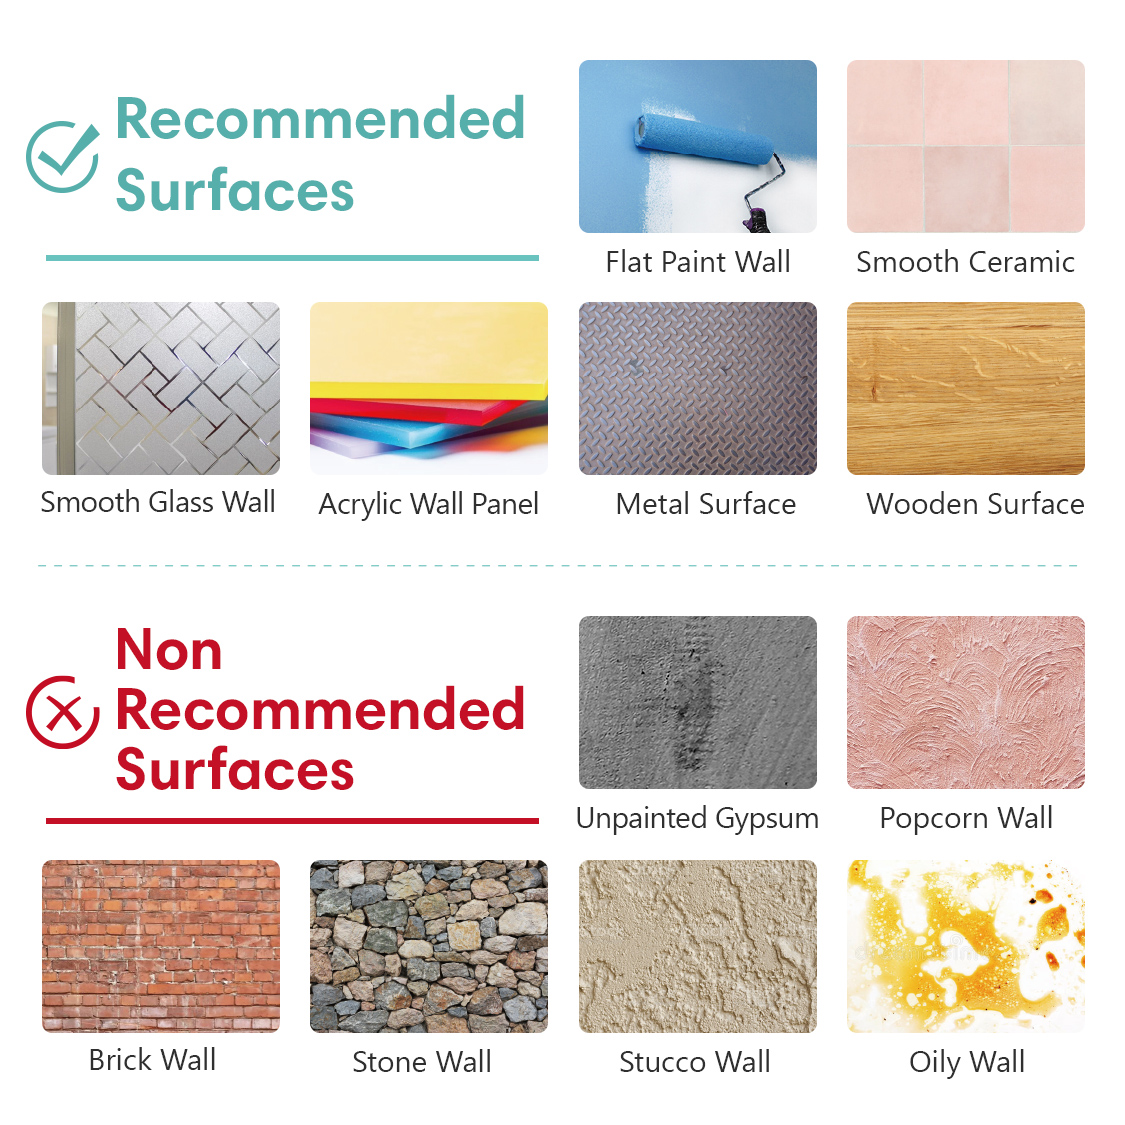
Elevate Your Home with 3D Distressed Neutral Brick Wall Panels Peel and Stick – Farmhouse Charm Made Easy!
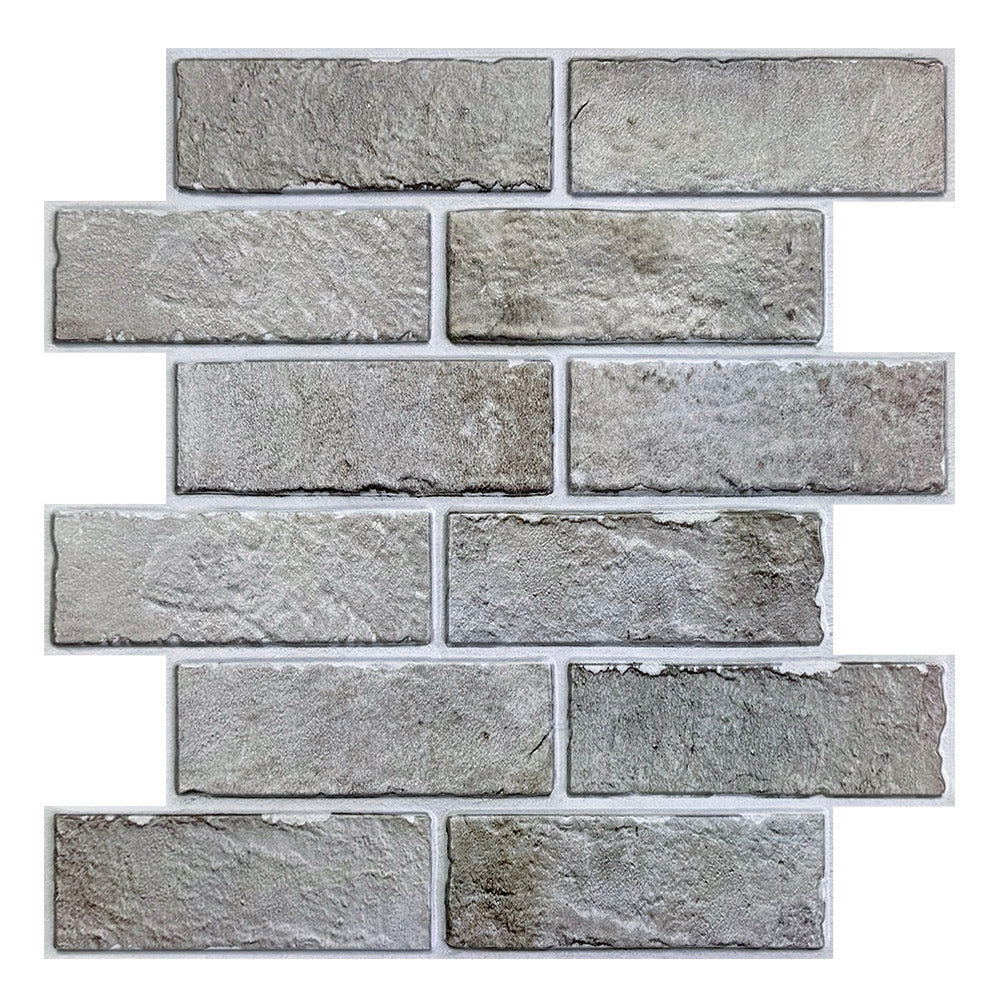
Bring the timeless appeal of weathered brick to your home with our 3D Distressed Neutral Brick Wall Panels Peel and Stick. Perfect for adding a touch of rustic elegance to any space, these panels are designed to effortlessly enhance your farmhouse decor while offering the convenience of a DIY-friendly installation.
What‘s Include
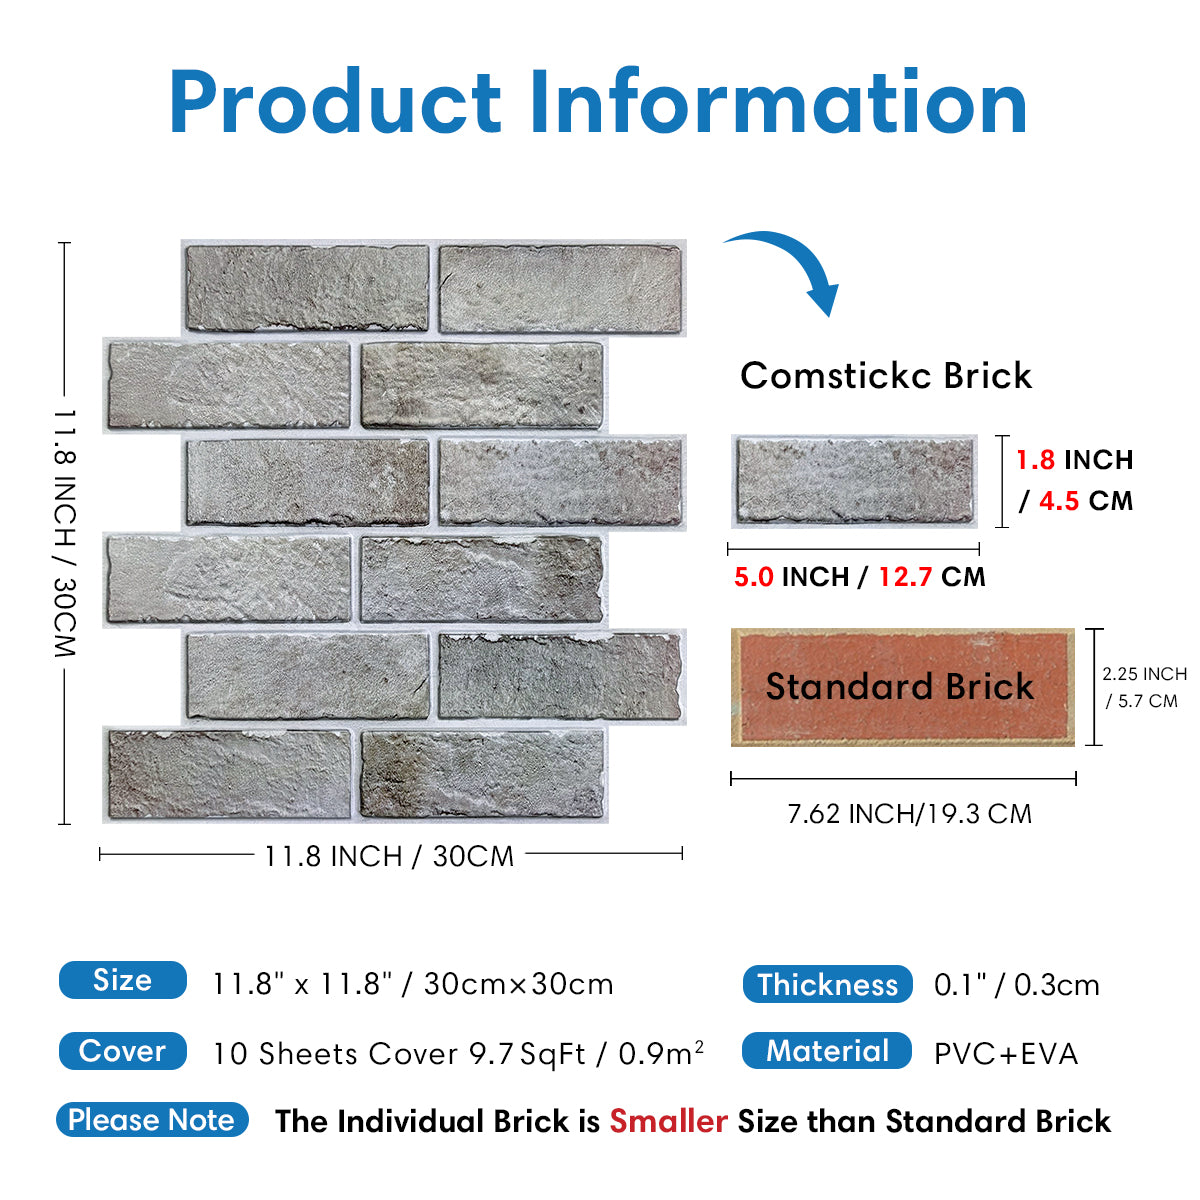
- 10 Sheets Per Pack
9.7 Square Feet / 0.9 ㎡ Per Pack
11.8 Inches x 11.8 Inches x 0.1 Inches / 30 cm x 30 cm x 0.3 cm Per Sheet
Product Detail
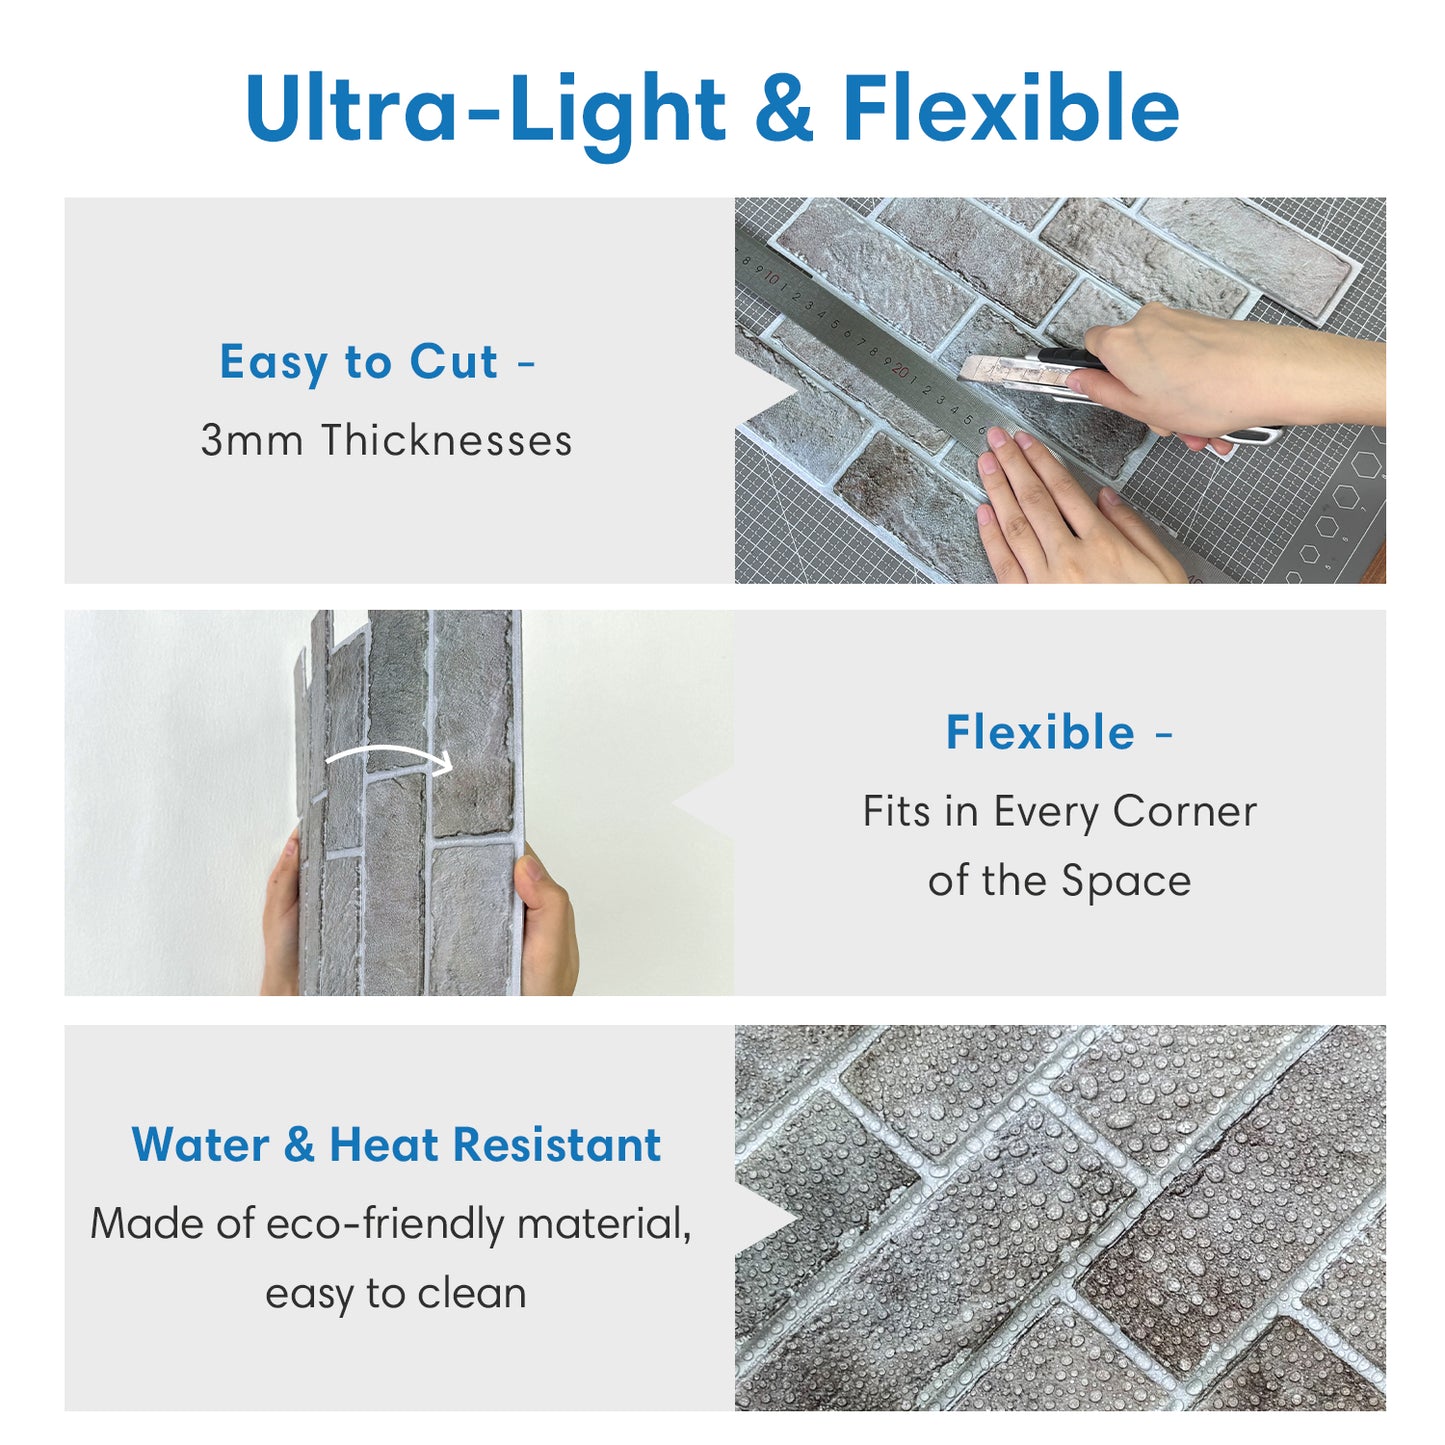
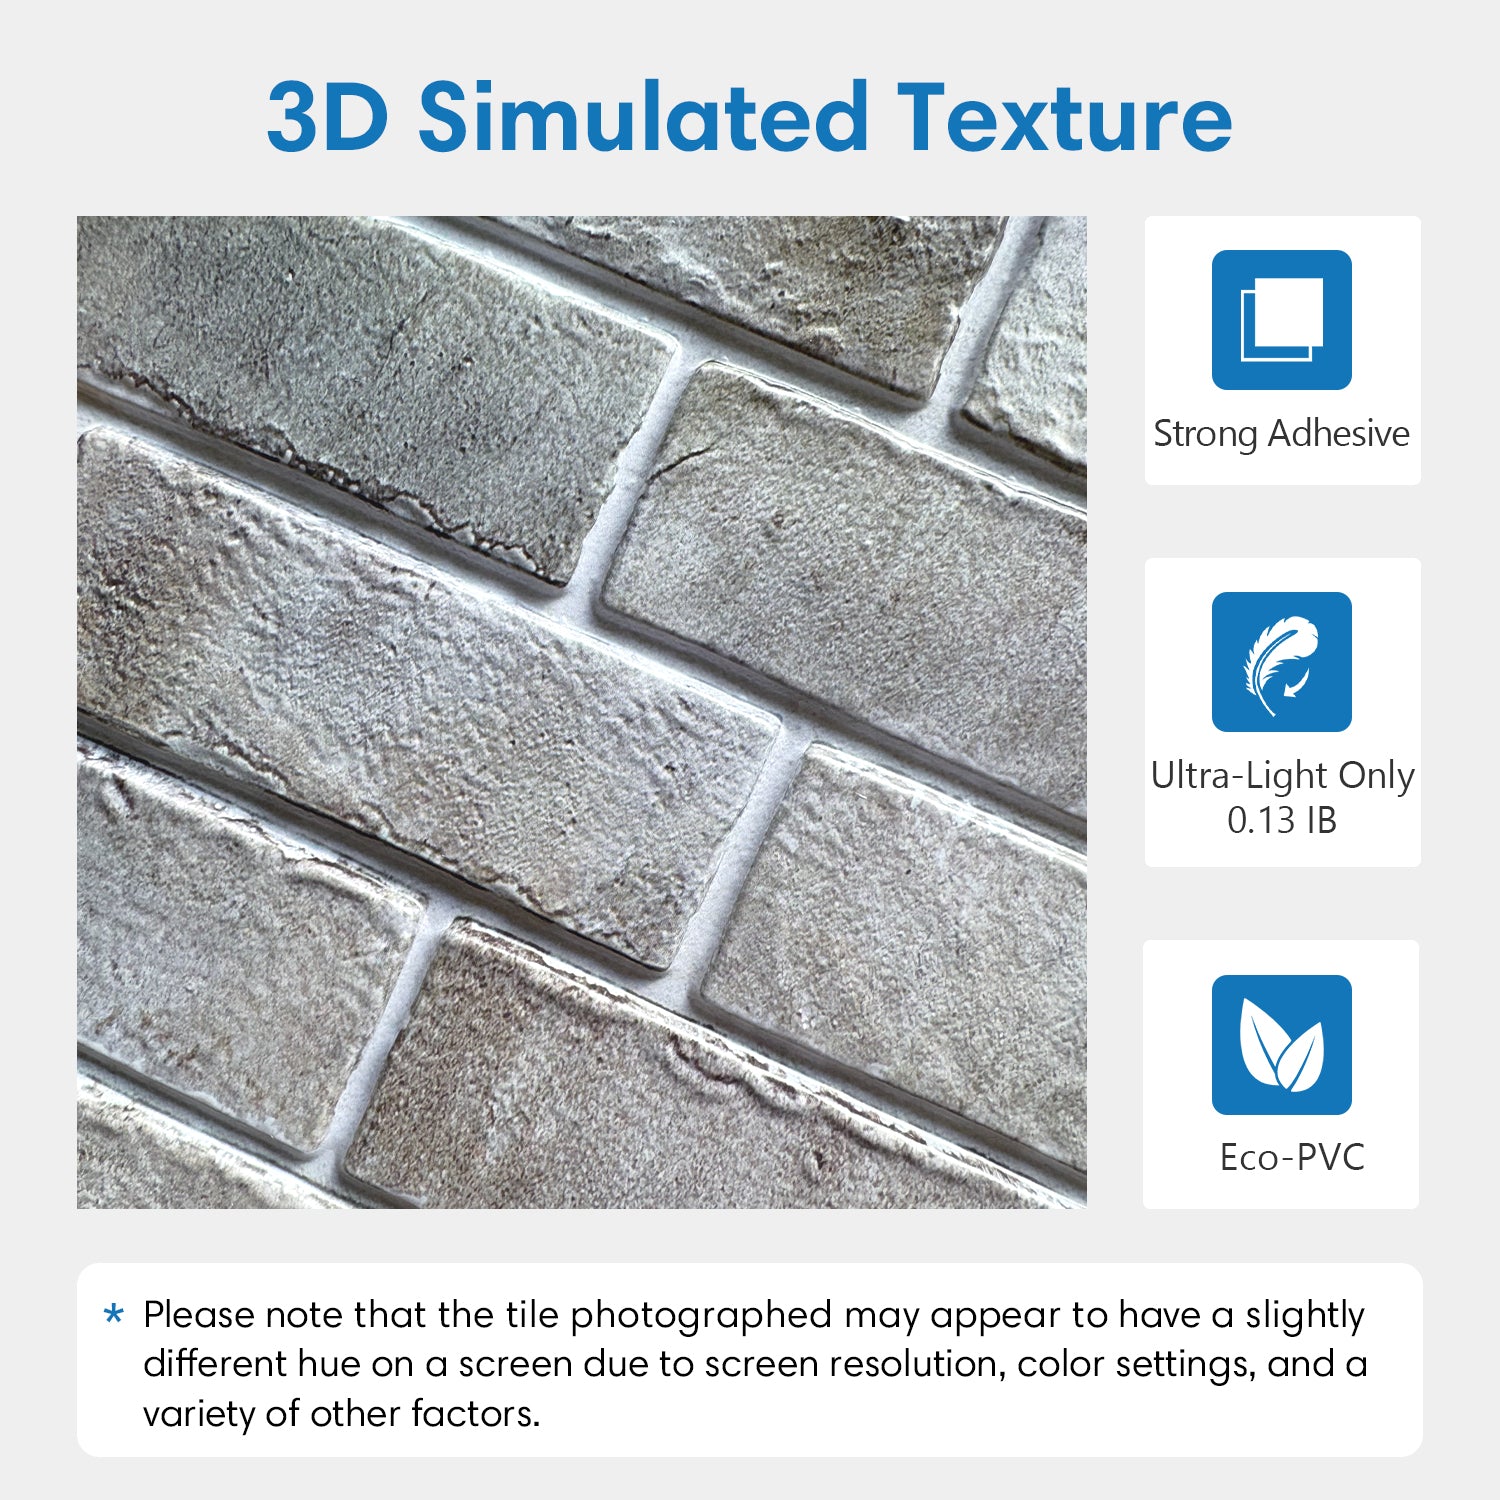
- Product Type: Faux Brick Wall Panels
- Primary Material: PVC
- Surface Type: Matte
- Water Resistant: Yes

*Our product pictures are actual pictures. Photography on this page is for representation only. Please note that the tile photographed may appear to have a slightly different hue on a screen due to screen resolution, color settings, and a variety of other factors.
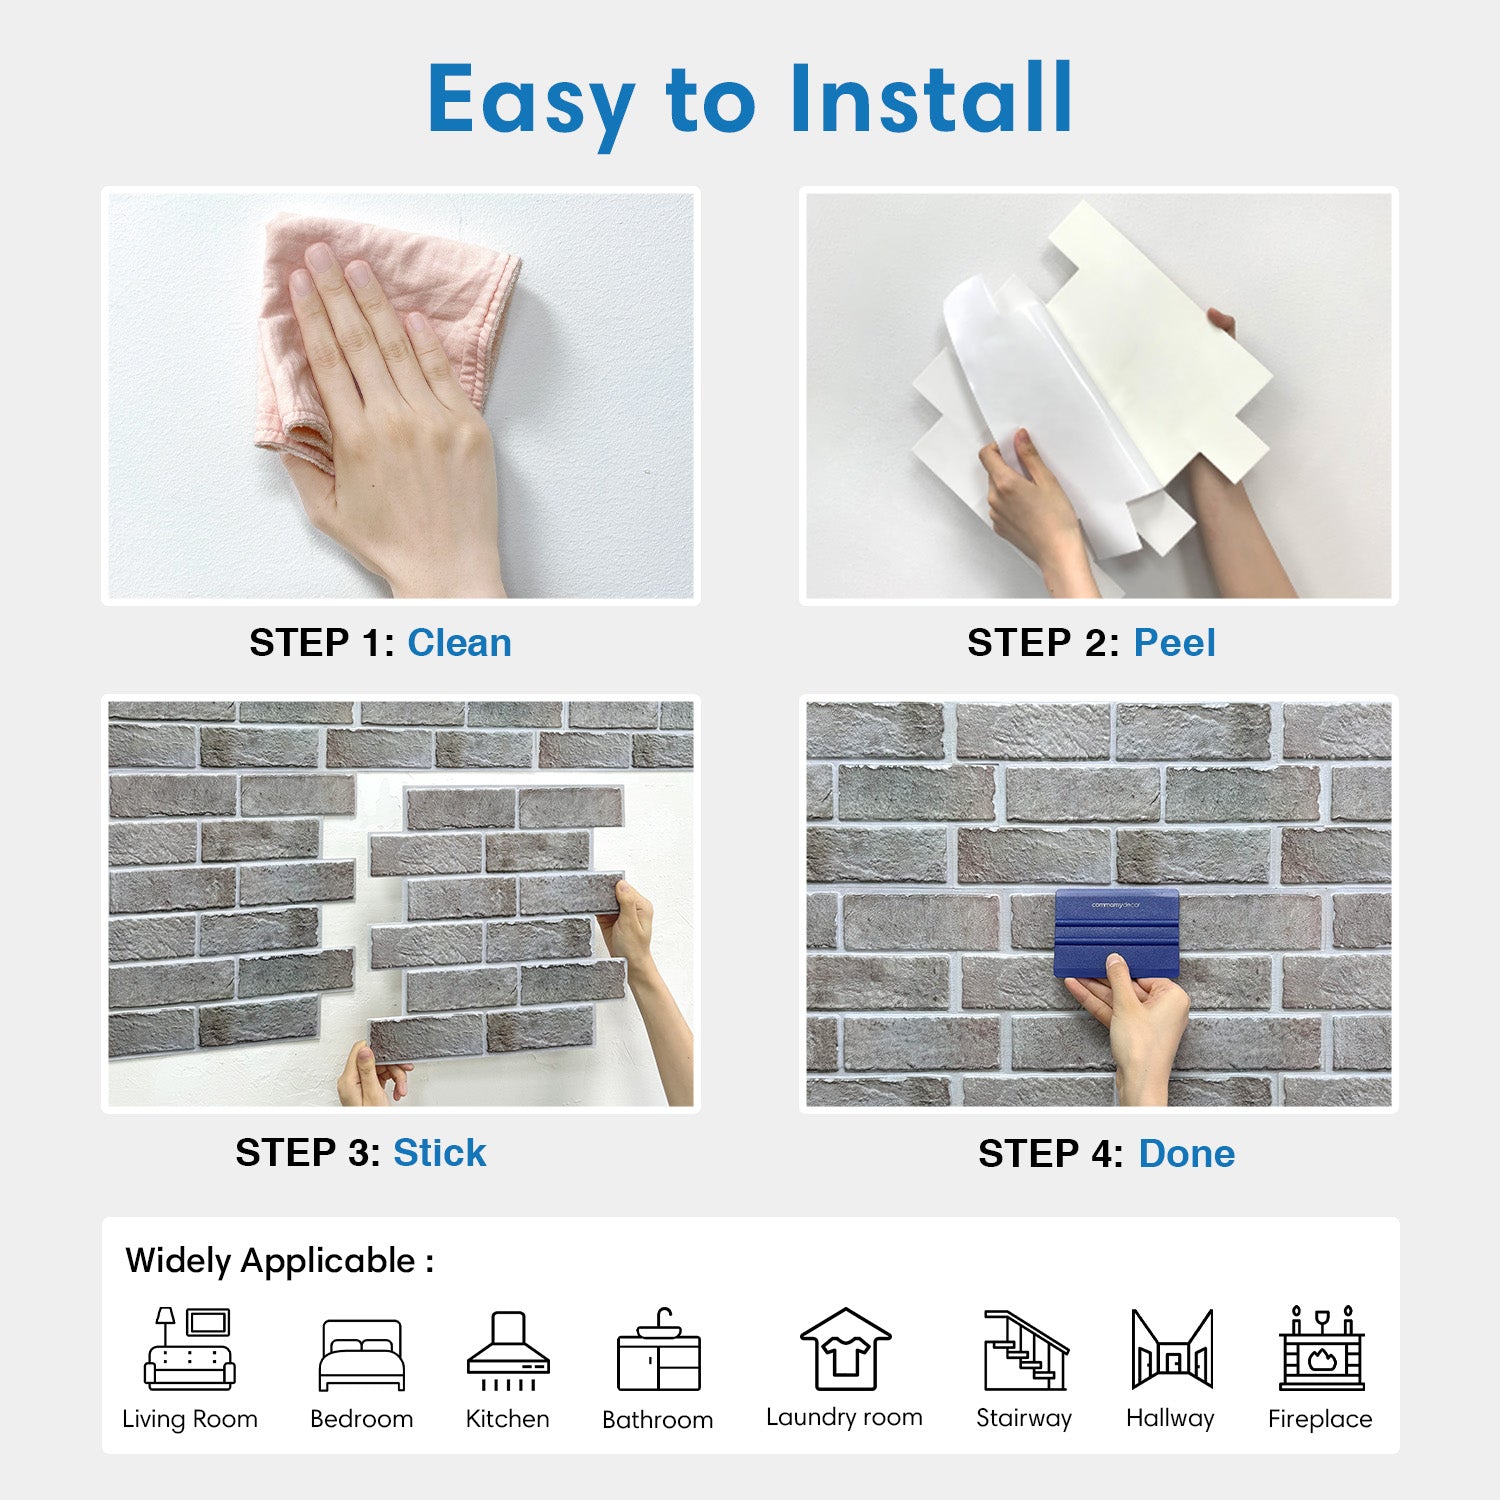
*Purchase Enough Tiles at A Time. Please consider a 10% cutting loss and make sure they come from the same batch to avoid slight color differences.